Mmmm. There it goes down, down in my belly.
Fear not, friends who know I’m a teetotaller. I’m not talking about Ron Burgundy’s scotch. Or Ron Swanson’s, for that matter. I’m talking butterscotch.
It started with the strawberry cake that about-to-be 7yo Guppy requested for his birthday. After making the cake, I had eight egg yolks. What to do?

Butterscotch pudding with whipped cream
Make pudding! Jennifer Reese of Tipsy Baker’s recipe for Butterscotch Pudding from her book Make the Bread, Buy the Butter calls for 4 egg yolks. Four is exactly half of eight. (Who said fractions aren’t important?) It was a sign from the Kitchen Goddess (who I’ve tentatively identified as Hestia; what do you think?) I could make a double batch!
And so I did; the recipe is below. Butterscotch pudding has become a comfort-food dessert at many restaurants around the Twin Cities. Now I can satisfy my craving for it on a whim. I’m not sure if this is a good or bad thing. But perhaps that’s because I made a double batch, which seemed excessive after a while, even for me. I suggest that you make a single batch. Unless you have 8 egg yolks. Then, what else are you supposed to do?
Reese advises 1. adding a teaspoon of Scotch or bourbon with the butter and vanilla, 2. straining the pudding before putting it in containers, and 3. using small ramekins or teacups for individual servings. But I was impatient for pudding and serving it to small children, so I skipped the Scotch, straining and separate cups. The pudding was still delicious.
Alas, what I couldn’t skip was my conviction that the pudding should be topped by whipped cream.
Reese’s recipe for whipped cream is simple; it’s below. Now, the dead-simplest is to get some cold heavy cream and whip it, which can be arduous if you do it by hand, but goes fast with a hand-held mixer. But adding a little sugar and vanilla does make it even better.
But, the trouble with home-made whipped cream is that it doesn’t keep, it weeps. One way to combat this is to store it in a metal sieve over a bowl, but this tends to dry out the cream. I found another idea in the Genius Recipes archive at Food 52. Nancy Silverton adds creme fraiche to the whipping cream to stabilize it; recipe below. So back I went to Reese’s book, as she has a ridiculously simple recipe for Creme Fraiche though it takes 24 hours; recipe also below.
Ah, so then, was I satisfied? Oh, no. I’d gotten a taste for butterscotch, so my mind turned to my favorite cookie from childhood, the oatmeal scotchie. I tweaked the recipe from Cook’s Illustrated, which was in turn a tweak of the back-of-the-box recipe I’d made going up. I upped the amount of salt a titch, and can testify that it only makes these more crave-able.
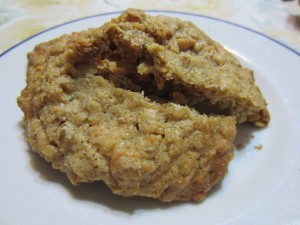 Oatmeal Scotchie cookies
But, perhaps you are not a butterscotch person. My friend Becca has a theory, which is that people either like it or not, they’re not indifferent, and those who do like butterscotch tend to also like coconut, and not liking butterscotch usually means not liking coconut, too. (What math property is this? Transitive? Commutative?) Feel free to add evidence either way in the comments. So if you don’t like butterscotch, use chocolate chips. Do not use raisins. I have coined a term: RAISIN-TMENT, which is the bitterness I feel and taste when I bite into a cookie expecting chocolate chips, and get raisins instead. Then I give the cookie away, appearing generous, but really being self serving. Or not, as the case may be.

Guppy verifies that the pudding is delicious with the 11th Doctor's sonic screwdriver
Also, remember, pudding can be deadly. Be careful out there.
***
All the recipes from this post:
Butterscotch Pudding, adapted from Make the Bread, Buy the Butter (also, buy the book)
2 1/4 cups milk
3/4 cup heavy cream
4 large egg yolks
3/4 cup dark brown sugar, packed
1/4 cup cornstarch
1/2 teaspoon kosher salt
2 Tablespoons unsalted butter, cut into bits
1 Tablespoon vanilla extract
1. In a medium saucepan, bring the milk to a boil. Remove from the heat.
2. Meanwhile, in a large bowl, whisk together the cream, egg yolks, sugar, cornstarch, and salt until well blended.
3. Pour a splash of hot milk into the egg yolk mixture, whisking constantly. Gradually whisk in the remainder of the milk.
4. Pour the mixture back into the pot and cook over medium heat, whisking constantly, until it begins to thicken, 3 or 4 minutes. Do not let it boil.
5. Remove from the heat and whisk in the butter and vanilla.
6. Transfer to glass container, cover and chill for at least 4 hours until firm and cold.
Makes 3 1/2 cups, to serve 7
***
Whipped Cream, from Make the Bread, Buy the Butter
1 cup very cold heavy cream
2 tablespoons sugar
1/2 teaspoon vanilla extract, optional
Pour the cream and sugar into a large bowl* and beat until soft peaks form. If you want to use vanilla, add it after peaks have formed. Serve immediately. Makes 1 3/4 cups.
*Cold bowl and beaters = faster whipped cream. I keep my beaters in the freezer, and chill the metal bowl by filling it with ice water for one minute, draining and drying it, then adding the cold cream and beating with the chilled beaters. Probably a toss up of time chilling bowl vs. time saved on whipping, now that I write it out here. –GD
***
Creme Fraiche, from Make the Bread, Buy the Butter (see what a useful book it is?)
1 cup heavy cream
1 tablespoon buttermilk (real, not powdered or soured milk)
Pour the cream and buttermilk into a jar, cap, and shake. Leave in a warmish place–like beside the stove–for 24 hours, until thick. Refrigerate. It will keep for up to a week. Makes 1 cup.
***
Nancy Silverton’s Whipped Cream from Food 52
Makes 2 cups
1 cup whipping cream
4 tablespoons crème fraîche (or sour cream), to taste
To whip by hand, you need a very large bowl and a large, balloon-style whisk. The large bowl is necessary to be able to whip the cream vigorously without making a mess, and the style of whisk is very important: If you whisk is too small or has too few wires, it will take much more effort to whip the cream. Whisking vigorously, it should take about 3 to 5 minutes to bring the liquid cream to the proper consistency.
By machine, start on low speed until the cream thickens enough not to spatter. Increase the speed to medium high and continue to whip, stopping the machine before the cream will hold soft peaks. Remove the bowl from the electric mixer and finish whipping the cream by hand with a whisk. Fold or gently whisk in creme fraiche.
Note: Salvaging extremely overwhipped cream can be done. You must add up to 1/4 cup of cold whipping cream and work it in, stirring with a rubber spatula to restore the proper consistency.
***
Oatmeal Scotchies, adapted from America’s Test Kitchen/Cook’s Illustrated.
Makes 16 to 20 large cookies
Do not overbake these cookies. The edges should be brown but the rest of the cookie should still be very light in color. Parchment makes for easy cookie removal and cleanup, but it’s not a necessity. If you don’t use parchment, let the cookies cool directly on the baking sheet for two minutes before transferring them to a cooling rack.
Ingredients
1 1/2 cups unbleached all-purpose flour (or 1 cup AP flour and 1/2 cup whole-wheat pastry flour)
3/4 teaspoon table salt
1/2 teaspoon baking powder
2 sticks unsalted butter (1/2 pound), softened but still firm
1 cup light brown sugar
1 cup granulated sugar
2 eggs
3 cups rolled oats
1 cup butterscotch or chocolate chips
Instructions
1. Adjust oven racks to low and middle positions; heat oven to 350 degrees. In bowl of electric mixer or by hand, beat butter until creamy. Add sugars; beat until fluffy, about 3 minutes. Beat in eggs one at a time.
2. Mix flour, salt, baking powder, and nutmeg together, then stir them into butter-sugar mixture with wooden spoon or large rubber spatula. Stir in oats and chips. Reminder: do not use raisins. No one wants them.
3. With ice-cream scoop, make sixteen to twenty 2-inch balls, placing each dough round onto one of two parchment paper—covered, large cookie sheets. Bake until cookie edges turn golden brown, 22 to 25 minutes. (Halfway during baking, turn cookie sheets from front to back and also switch them from top to bottom.) Slide cookies on parchment onto cooling rack. Let cool at least 30 minutes before serving.


 Here is when I stopped the mixer to reduce the batter by 1/3. Hooray fractions! Also, to taste the batter to make sure it was good. It was.
 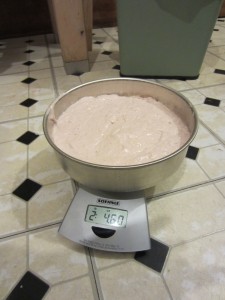 I weighed the layers to make sure they were even. Because sometimes I'm a dork like that. Also, because I own a kitchen scale, so why not?
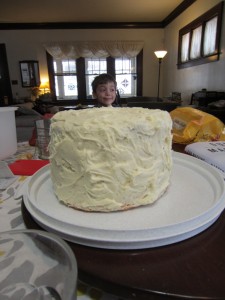 I like how the perspective makes Guppy's head look like a decoration on his own cake. I didn't have time to make it look fancy, so it looks like a big white puck


 Summer is kind of over–9yo Drake and 6yo Guppy boarded the school bus this morning, and I’ve spent the day reading, writing, staking floppy tomato plants, weeding, and doing laundry while through it all revelling in the peace and quiet.
 Melted butter. I put a stick of butter in the microwave for 30 seconds, which leaves bergs of butter then stir with a fork till the warm butter melts the bergs.
 I used the chemically colored/flavored/sweetened cherries but not the organic vanilla in deference to the original recipe.
 Black-enough bananas. If your bananas aren’t this gross, you can roast them in the pre-heating oven.
 Eggs from happy chickens. Really–they have names and their owner pets them.
 Buttered, floured sides give the bread something to cling to as it rises.
 Why yes, I _do_ use a Play-doh knife to take the loaves out so I don’t scratch the non-stick pans.


