 Last week, the New York Times ran an article on the pursuit of the “perfect” chocolate chip cookie, and included a recipe adapted from chocolatier Jacques Torres (Link from ALoTT5MA). It touched on people’s obsessions with the cookie, as well as things that can be done to tinker with the classic, back-of-the-Nestle-bag recipe.
Torres, for example, refrigerates his dough for 36 hours before baking. Food scientist Shirley Corriher, author of the excellent Cookwise and the upcoming Bakewise, laughed when she heard this, and said it was a clever way to dry out the dough and bind the flour and butter, thus creating a better-textured thick cookie that’s crisp on the outside and chewy in the middle.
Of course, I tried this recipe. I happened to have both cake and bread flour in the pantry, since those were the two types specified, rather than the more easily found all purpose. I used Guittard semi-sweet chips (which my grocery co-op sells in bulk), rather than spending $20+ on either of the chocolates the recipe called for, here and here. And because the timing was inconvenient, I made one batch about 31 hours after refrigeration, and the other about 47. The latter batch browned more nicely and turned out better. The earlier batch tasted more like sugar cookies (albeit very good ones) with chocolate chips. The latter batch tasted like excellent chocolate chip cookies. Even so, I probably won’t make this recipe again. The two special flours, plus the long refrigeration time are inconvenient. Even worse, I thought, was how difficult it was to scoop out the refrigerated dough. I tried letting it warm a bit, but that produced the lightest cookies in the bunch.
Instead, I’m returning to what has been my go-to chocolate chip cookie recipe for about three years, Pam (not Pamela!) Anderson’s Perfect Chocolate Chip Cookies. Making the dough is easy (though use unbleached all purpose; there’s no reason for bleached). Rather than refrigerating the dough, she says to scoop out dough balls, freeze them for at least 30 minutes, then bake first at 400F, then finish at 350F. It has a few more steps than the back-of-the-bag recipe, but it’s well worth it. The cookie, as promised, delivers puff, crisp, and chew. It browns nicely without having to wait 36 HOURS! as in the Torres recipe. Also, it’s a marvelous vehicle for experimentation with additions other than chocolate chips or chunks. I’ve even added some oats and wheat bran before with excellent results. Further, the dough balls can be refrigerated for a long time. I’ve made a batch after thirty minutes, then another weeks later. This is a versatile recipe with a few weird twists that produces great results without long waits, specialty flours, or expensive chocolate.
Perfect Chocolate Chip Cookies by Pam Anderson from USA Weekend
2 1/4 cups all-purpose flour
1 tsp. baking powder
1/2 tsp. baking soda
2 large eggs
1 tsp. vanilla
3/4 tsp. salt
14 Tbs. butter (2 sticks minus 2 Tbs.), cut into chunks
3/4 cup dark brown sugar
3/4 cup granulated sugar
2 Tbs. flavorless oil, such as vegetable or canola
1 1/2 cups chocolate chips or 8 ounces good-quality bittersweet or semisweet chocolate cut into 1/4-inch chunks, about 1 1/2 cup
OR
1 cup each chocolate chunks or chips and 1 cup toasted nuts (pecans, walnuts, unsalted peanuts or macadamias)
Hot tip: If you have a 3/4-cup measuring cup, it’s the only one you’ll need. The sugars measure 3/4 cup each, the chip quantity is 1 1/2 cups (3/4 cup times 2), and the flour is 2 1/4 cups (3/4 cup times 3).
Mix flour, baking powder and baking soda in a medium bowl; set aside. Mix eggs, vanilla and salt in a small bowl; set aside. Microwave butter on high power until just melted but not hot, 30 to 45 seconds; set aside. Mix brown and granulated sugars in a large bowl. Add butter and oil; stir until smooth. Add egg mixture and stir until smooth and creamy. Add dry ingredients and stir until smooth. Stir in chocolate and optional nuts. Using a 1 1/2-ounce (3 Tbs.) ice cream scoop, spoon 16 dough balls onto a pan that will fit in your freezer. (Don’t worry if the dough balls are crowded. They pull apart when frozen.) Freeze until dough is hard, about 30 minutes. (Once dough balls are frozen, they can be stored in freezer bags up to 3 months and baked as desired.)
Meanwhile, adjust oven rack to upper middle position and heat oven to 400 degrees. Working in half batches, place 8 frozen dough balls onto a parchment-lined cookie sheet. Bake until set, but not brown, 8 to 10 minutes. Reduce oven temperature to 350 degrees. Continue to bake until cookies are golden-brown around the edges and lightly brown on the top, about 10 minutes longer. Let cookies cool on cookie sheet. Repeat, preheating oven to 400 degrees again before baking second batch.
Cookies can be stored in an airtight container up to 5 days.
Servings: 16 large cookies.
ADDED LATER: Boing Boing discusses Ideas in Food’s experiment with vacuum sealing the NYT recipe’s dough, which significantly reduced the 36-hour refrigeration. The vacuum-sealed dough looked much different than what I’d made, which was significantly lighter in color. And the cookies looked different also. Theirs were browner, but high in the middle and thin on the edges. Mine (see above) were a uniform 1/4 inch from center to edge.


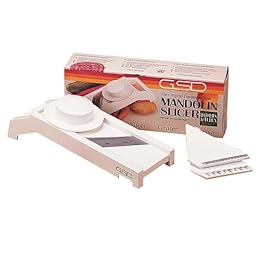 Mandoline: A $10 purchase at Target, this made-in-China one is flimsy, but it’s getting lots of use in spite of that. The thin slicer attachment does great work on radishes (for eating with sweet butter on fresh bakery bread), cucumbers, and carrots for salads. When it breaks, I think I’m likely to spring for a better-made one.